
Working with Outlook AutoComplete (.nk2) files
Outlook remembers and stores the e-mail addresses you type in the From, To, Cc, and Bcc boxes. When you begin entering a previously typed e-mail address, Outlook automatically recognizes it and completes the text for you. To accept a suggestion, all you have to do is press the ENTER key.
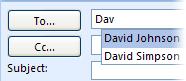
For e-mail addresses with the same first three characters, Outlook provides all applicable suggestions in a drop-down box. Use the UP ARROW key and the DOWN ARROW key to select the e-mail address you want, and then press ENTER. If stored addresses exceed seven, a scroll bar will appear.
NOTE To delete stored e-mail addresses from the drop-down box, simply use the arrow keys to select the e-mail address you want to delete, and then press DELETE.
To turn off automatic completion of e-mail addresses
1. On the Tools menu, click Options.
2. Click E-mail Options, and then click Advanced E-mail Options.
3. Under When sending a message, clear the Suggest names while completing To, Cc, and Bcc fields check box.1
To copy the names in AutoComplete to another computer
Important You must exit Outlook before starting the following procedure. The names will be included in AutoComplete when you restart Outlook.
1. On the computer with the saved AutoComplete names, go to drive:Documents and Settingsuser nameApplication DataMicrosoftOutlook.
Note Depending on your file settings, this folder might be hidden. To view the files in this folder, do the following:
1. Double-click My Computer.
2. On the Tools menu, click Folder Options.
3. Click the View tab, and then, under Advanced settings > Hidden files and folders, click Show hidden files and folders.
2. Right-click profile name.nk2, and then click Copy.
Tip You can copy the file to removable media, such as a floppy disk or a CD, and then copy the file to the correct location on the other computer. Or you can attach the file to an e-mail message and send the message to yourself. On the new computer, open the attachment in Outlook, and then save it to the correct location.
3. On the computer where you want to populate the AutoComplete feature, copy the file to drive:Documents and Settingsuser nameApplication DataMicrosoftOutlook.
4. If the Outlook user profile name is different on the computer where you are moving the .nk2 file, you must rename the file with the same Outlook user profile name after you copy it to the correct folder. For example, if you move Kim Akers.nk2 from the original computer with an Outlook user profile name of Kim Akers, and you copy the Kim Akers.nk2 file to the new computer, you must rename it with the Outlook profile name being used on the new computer.
5. When prompted about replacing the existing file, click Yes.
6. Open Outlook to view changes.2
To rebuild a corrupted or deleted .nk2 file
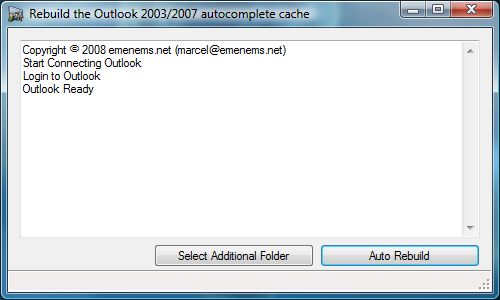
1. Download RebuildOutlookCache from this article, uncompress it to a folder on your desktop, and double-click the RebuildOutlookCache.application file
2. Install the program and start it
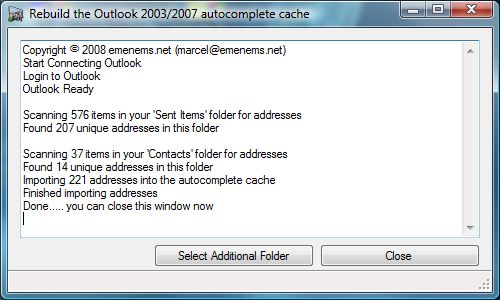
3. Next click on the “Auto Rebuild” button, this will process your “Send Items” and your “Contacts” Folder. If you like to scan other folders then select those with the “Select Additional Folder” button before you press the auto Rebuild Button.
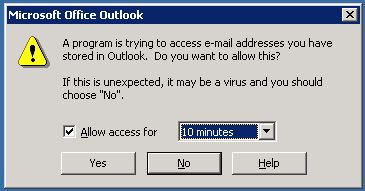
4. Your outlook will probably warn you that a program is trying to access E-mail addresses. set it to allow access for 10 minutes and click OK
5. After a while it will finish and you can enjoy the autocomplete again.
Don’t forget to close Outlook before you reboot. It seems some versions of outlook don’t save the nk2 file if they are killed by a reboot.3
To edit existing AutoComplete entries
1. Back up your current NK2 file by making a copy in a separate location than the default (drive:Documents and Settingsuser nameApplication DataMicrosoftOutlook)
2. Download NK2 View from http://www.nirsoft.net/utils/nk2view.zip
3. Extract the executable (nk2view.exe) and run the file. The NK2View utility displays the AutoComplete list of the default Outlook profile. If you want to view the AutoComplete list of other profiles, simply use the ‘Open .NK2 File’ option.
4. Double-click entries to edit, click on the X in the toolbar to delete, or click on the plus sign (+) in the toolbar to add new.
5. Save the NK2 file using the disk icon in the toolbar.4
Sources:
1 http://office.microsoft.com/en-us/outlook/HA010347921033.aspx?pid=CH010496931033
2 http://office.microsoft.com/en-us/outlook/HA011394511033.aspx?pid=CH010496931033
3 http://www.nirsoft.net/utils/outlook_nk2_autocomplete.html