
If you stay up with the latest and greatest of the data analytics community, by now you have heard of Spark – the Apache project for big data processing, machine learning and streaming data. Tableau has a connection for Spark SQL, a feature of Spark that allows users and programs to query tables using SQL. At a high-level description, Spark can ingest data from many different sources (typically Hadoop) and pull data into memory for faster processing speeds. When Spark hits the limits of its in-memory capabilities, it uses writing to hard-disk temporarily to keep the process moving. This allows for faster querying speeds of things that would take much longer using MapReduce or other methods.
For most Tableau developers, this just means another data source from which to connect. But for those of us really interested in getting data from source to end user in Tableau, this process can be a little more complicated than just having a spreadsheet on your desktop. To show a simple example of getting large text files from source to Tableau, I want to walk through the following example.
I will be using an Amazon Elastic Map Reduce (EMR) deployment of Hadoop on Amazon Web Services (AWS). When deploying AWS through the web console, you can now have Amazon install Spark along with Hive to make deployment much simpler. I’m running Spark 1.5.2 and Hive. I will also be assuming that a user is using the command line interface to do all of the work.
Step 1: Get S3 Data to Hadoop
The first thing we need to do is get some data onto Hadoop. Now, you can use Spark to query S3 directly, but I wanted to utilize Hadoop. I used the Google N-Grams data set, which you can read about here. I used 1-grams, which means I brought in data related to single grams (“Alex,” “dog,” “#,” etc.). The data tracks how many times a 1-gram appears in a year. Since every word by itself is considered a 1-gram, the data can be rather large and makes for a good test data set for Spark.
I won’t go into all of the details about the AWS environment, but because this data set is publicly available through AWS S3, we can load the data into our Hadoop Distributed File Store (HDFS) through the following MapReduce code:
$hadoop-streaming

 -D mapred.reduce.tasks=0

 -input s3n://datasets.elasticmapreduce/ngrams/books/20090715/eng-all/1gram/

 -inputformat SequenceFileAsTextInputFormat

 -output ngrams

 -mapper /bin/cat
Now on another distribution, this command may look differently. EMR allows you to call “hadoop-streaming” without specifying the location of the .jar file.
Step 2: Copy Hive Configuration File to Spark
After running this command, we can check to see that our reading in of the data worked by checking our Hadoop file store with the following code:
$hdfs dfs –ls
Like the Linux command “ls,” this will show us the file directory of Hadoop. We should see a folder listed called “ngrams” or whatever name you gave it in the MapReduce code.
Now that we have the large data set copied to our Hadoop instance, it’s time to get ready to fire up PySpark – the Python interface for Spark. However, in order to work with the Hive metastore and eventually show tables to Tableau, we need to copy the hive-site.xml folder to our Spark ./conf folder. On AWS, the hive-site.xml file can be found in the /usr/lib/hive/conf/ folder and needs to be copied to the /usr/lib/spark/conf/ folder:
$cp /user/lib/hive/conf/hive-site.xml /usr/lib/spark/conf/
Now that we have that accomplished, we can start to use PySpark.
Step 3 – Use PySpark to Read Data and Create Table
By typing “pyspark” in the command line we can bring up the PySpark command line interface. Give it a minute to load as you will see lots of code flash through the console. Once loaded, you should see the Spark logo.
You can then use the following code, one line at a time to create a table that you can later use in Tableau:
#Read in the Text File on HDFS
text = sc.textFile("1gram")

#"Map" the Text File as Tab Delimited
text2 = text.map(lambda x: x.split("t"))

#Check to see that the first line is correct
text2.first()

#Create a Spark Data Frame from the Tab Delimited File. Second part specifies schema.
df = sqlContext.createDataFrame(text2, ['index', 'ngram', 'year', 'occurrences', 'pages', 'books'])

#Save as a Hive Table for Future Use
df.saveAsTable("one_gram_table")

#Cache the Table
df.cache()
Now for performance purposes, I know that I would like to only look at “Alex” and “Alexander” in Tableau. To create a table where only the 1-grams “Alex” and “Alexander” are included, I can use PySpark to create another table:
#Use SparkSQL to Query the one_gram_table and create a Data Frame
alex_alexander = sqlContext.sql("SELECT * FROM one_gram_table WHERE ngram = 'Alex' or ngram = 'Alexander'")

#Create New Table
alex_alexander.saveAsTable("alex_and_alexander")
Step 4 – Run Thrift Server
Now that we have created tables for querying in Tableau, we can start the thrift server. To do this, I used the following code:
$sudo /usr/lib/spark/sbin/start-thriftserver.sh --master yarn --conf spark.ui.port=4049 --executor-memory 8G --num-executors 5 --driver-memory 4G --hiveconf hive.server2.thrift.port=9999
Thriftserver is also used for Hive, with a default port of 10000. In order to ensure there are no problems, I change the port to 9999. As well, I increase both the driver-memory and executory-memory options. I did this because if Tableau queries the server with a heavy query and I run into a memory error, the Thriftserver will shut down. There are ways of handling this in the enterprise, but I will leave to the real IT experts to talk about that. For my purpose, this will work fine.
To test the Thriftserver, I can then use Beeline. For information on how to do this, see here.
Step 5 – Connect Tableau
Now that we have a server running and tables to query, we need to connect Tableau. First things first: If your security rules are set such that only certain traffic and certain IP addresses can access your EMR instance, then you should make sure that computer you are on will pass your security rules.
After you’ve made sure that your security rules will allow you to use Tableau to connect to your instance, let’s open Tableau and connect to data:
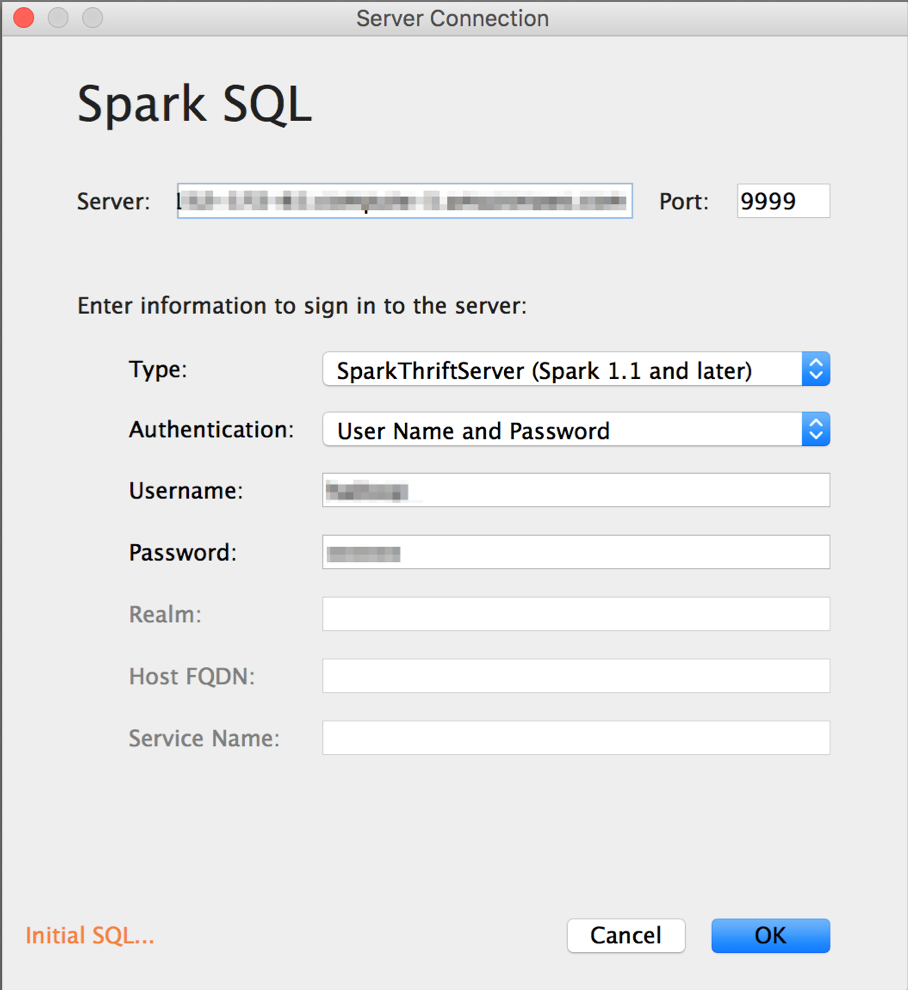
In the Server box, put your AWS Public DNS for your Master Node. Make sure to change your port to the port number you specified while starting the Thriftserver. Also, make sure to include the username and password for your user.
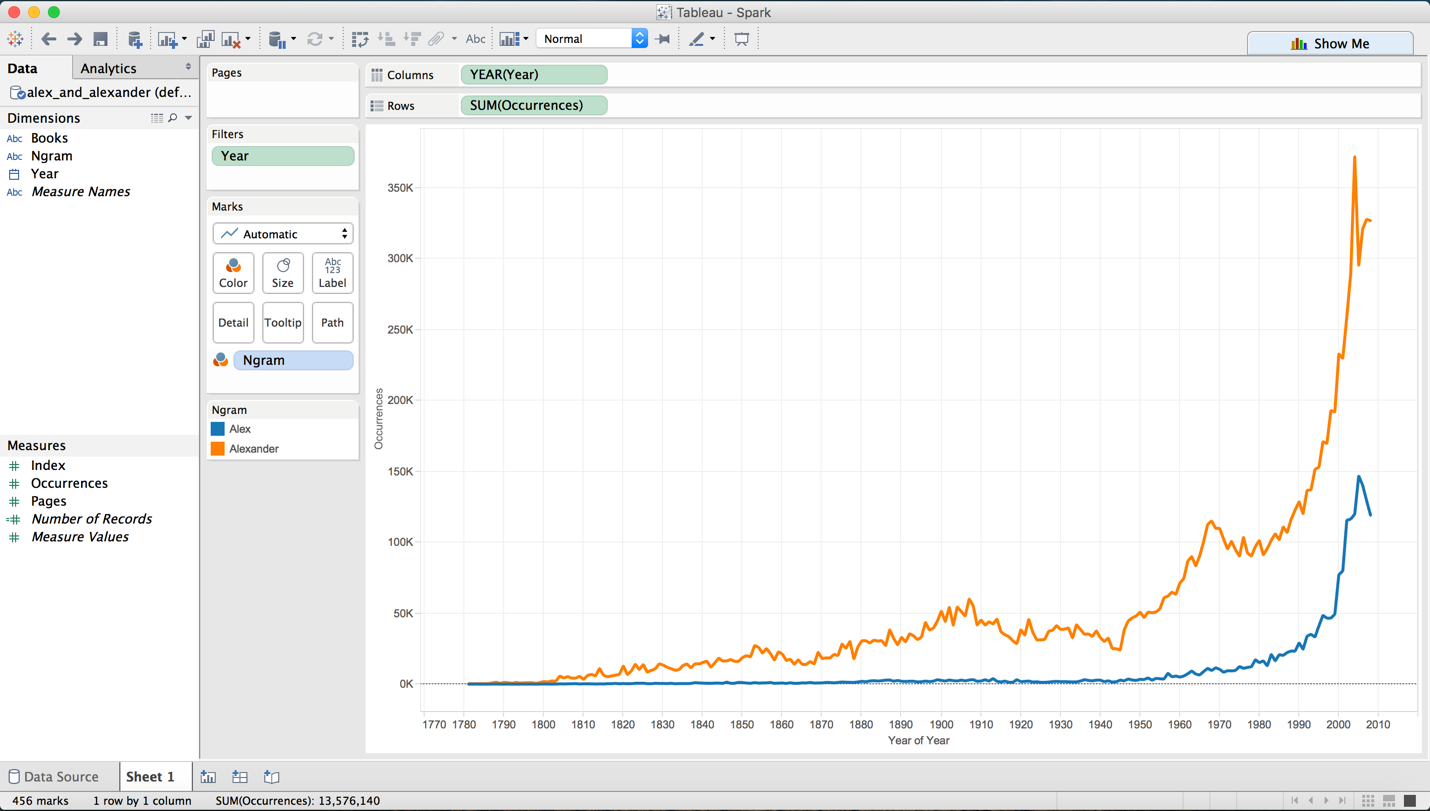
Once connected, you can use Tableau in all the ways you normally would. Since I was interested in comparing the 1-grams “Alex” and “Alexander,” I created a time series chart:
Connecting Tableau to Spark SQL can be overwhelming at first, but it can be an easy way to access big data sets and analyze them using a familiar tool once set up correctly. Look for more articles on Spark and its more advanced functionality on big data back here in the future.