
Tableau Deep Dives are a loose collection of mini-series designed to give you an in-depth look into various features of Tableau Software.
Constant sets are sets that once created do not change. If the underlying data changes, the membership of the constant set does not change to reflect these differences. These are also known as manually created sets. In this part of our Deep Dive on sets, we will examine how to create constant sets using a couple different methods. Finally, at the end of this article, we will see how disaggregation affects set creation.
Method #1: Click and Create
On any view, you can select marks or headers to create a set. First, I’ll start with a basic bar chat, such as our country by population from part one of this series. I’m just going to click on whichever countries I want to include in my set. When I do, I get the option to create a set in my tooltip:
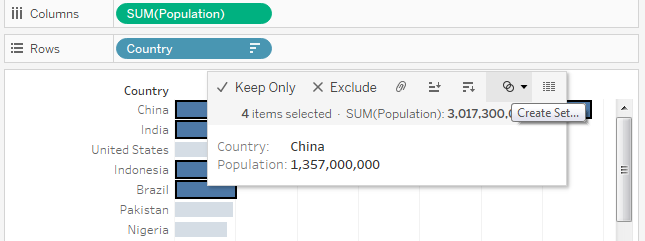
Alternately, I can right-click on any of the selected marks and choose Create Set from the context menu. Either way brings up the following Create Sets window:
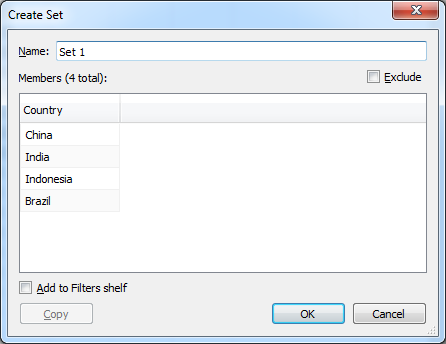
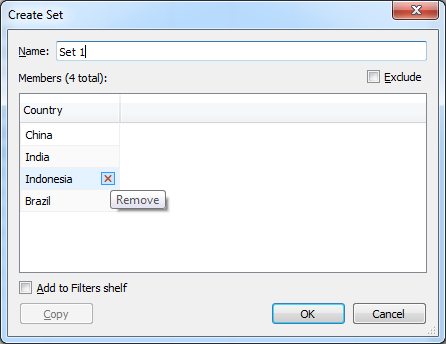
Currently, these members of the Country dimension are considered IN the set while all other countries are OUT of the set. If I click on the radio box Exclude, then it will reverse this relationship, where these five countries are now OUT and everything else is IN. I can remove any of these members by moving my cursor over the country and clicking on the red X that appears next to it:
Finally, I can click on the Add to Filters shelf to have my newly created set automatically applied to my view as a filter.
Method #2: General Tab
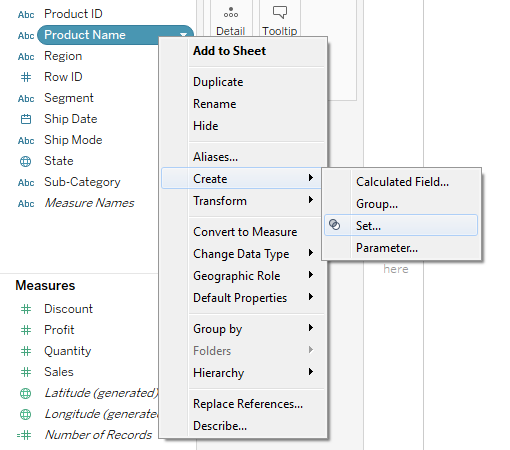
Another way to create a constant set is to right-click on a dimension in the data pane and select Create > Set.
That brings up a different Create Set window. This window gives you the ability to create your set using a variety of different methods, including manual selection, conditional logic and top/bottom N. This is also the method that we’ll use to create Computed Sets in part three of this Deep Dive. You might notice how similar the Create Sets window looks in comparison to the Create Filter window. Indeed, a lot of the functionality here is the same:
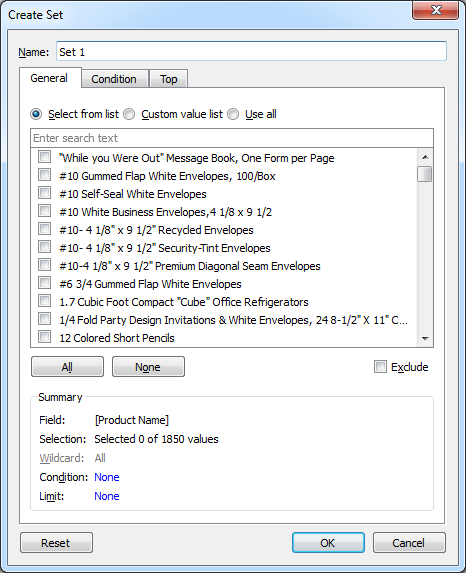
For a constant set, we’ll only use the General tab.
Let’s imagine a potential use case. I want to create a set for any product from a particular manufacturer. For this hypothetical example, I’m going to choose Eldon products from the Sample – Superstore Sales data source. I’ll use the Select from List option, click the None button to deselect all results and then type in “Eldon” in the search box.
This brings up a search result of all products that have “eldon” in their alias:
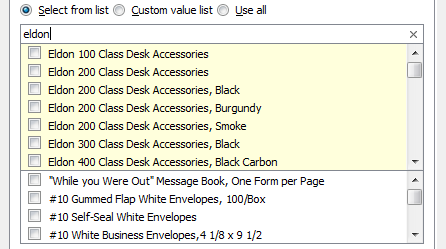
Remember, it is searching for “eldon” in any context and not necessarily at the start of the product name. If you happen to have a product that has “eldon” inside of its title, such “Sheldon Pencil Holders”, those products will also be included in this search result. A quick scroll through the search results confirms that I’m only selecting members for my set that are appropriate.
I’ll press the All button and create a set of Eldon products:
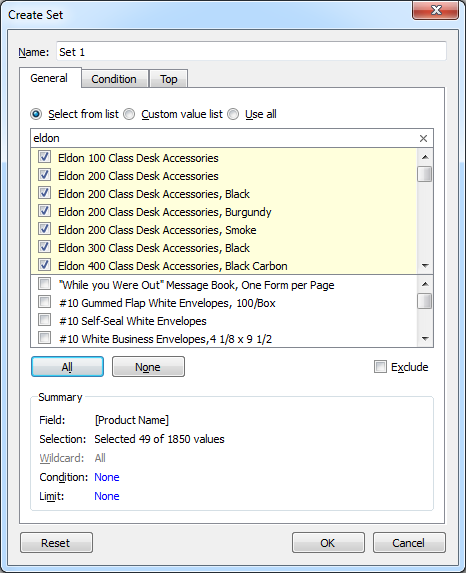
Note how my Summary area has changed as well. I’m now including 49 values in my set of a potential 1,850 products. It’s important to remember that creating a set this way is not dynamic. Future products for this manufacturer (i.e. those that include “eldon”) will have to be added manually.
Disaggregation and Sets
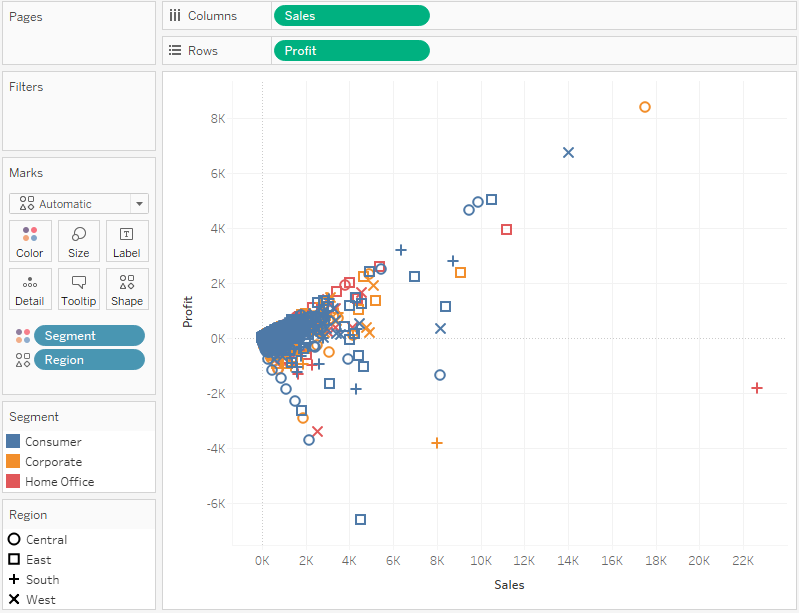
You may have discovered that there are instances in which you are not given the option to create a set. Let’s examine this scenario using a scatterplot. Let’s build the following view: Profit on Rows and Sales on Columns with Aggregate Measures turned off in the Analysis menu. I’ll add Segment to Color and Market to Shape. Here’s the view I get:
When I drag and select a group of marks in this view, I do not get the option to create a set:
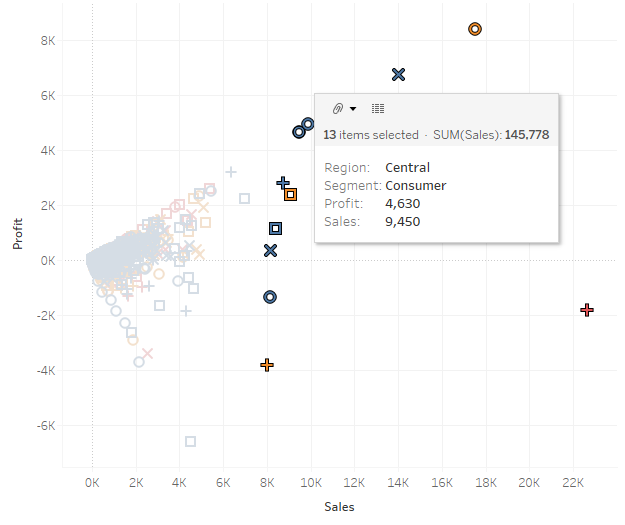
I only get the option to create a group. The other options, such as Keep Only and Exclude, are also missing.
Why?
Remember in part one of our Deep Dive on sets, we stated that sets are fields that we create based on existing dimensions. In the scatterplot above, profit and sales are completely disaggregated. Without a dimension in our level of detail, we cannot create a set. Having dimensions on the Color shelf or Shape shelf does not satisfy this requirement.
To fix this problem, let’s first turn Aggregate Measures back on in the Analysis menu and then drag a dimension onto the Detail shelf. I know that I can replicate my original scatterplot by using the Row ID dimension in Global Superstore training. The Row ID field is a record-level key, which offers me the same granularity as disaggregation.
As that is a dimension, however granular, I now get the option of creating a set when I select my marks:
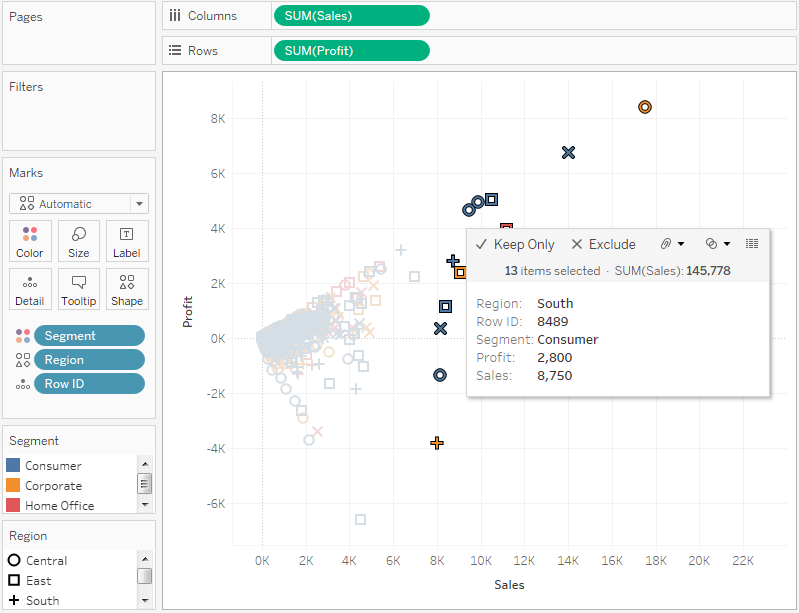
Each member of the set from the above scatter plot has three attributes – from the Detail shelf (Row ID), the Color shelf (Segment) and the Shape shelf (Market). My Create Set window looks like this as a result:
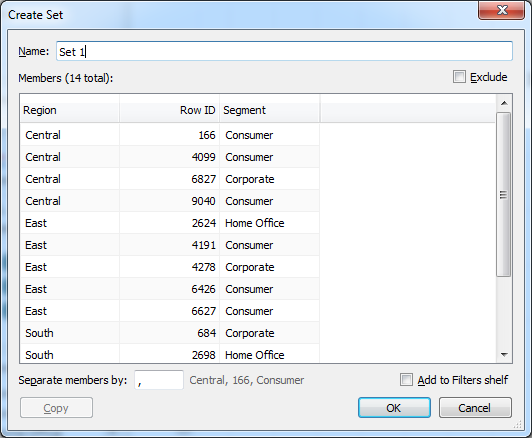
I can choose to change the character that separates the members of my set. Currently, it is a comma. This will change how the members of the set appear if they are used as headers. Finally, I can also remove which dimensions are considered in my set:
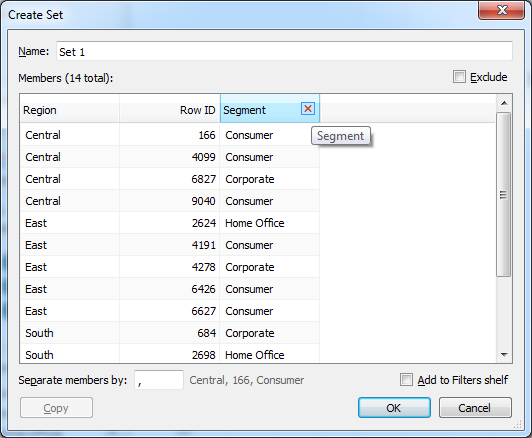
Just like removing individual members, I can mouse over the dimension header and click the red X to remove it from the set.
Order of Operations Revisited
In the introduction of the Deep Dive on Sets (part one), I explained how sets are considered earlier in Tableau’s order of operations. I used this knowledge to remove dimension members form my filter control. Let’s now build that example together.
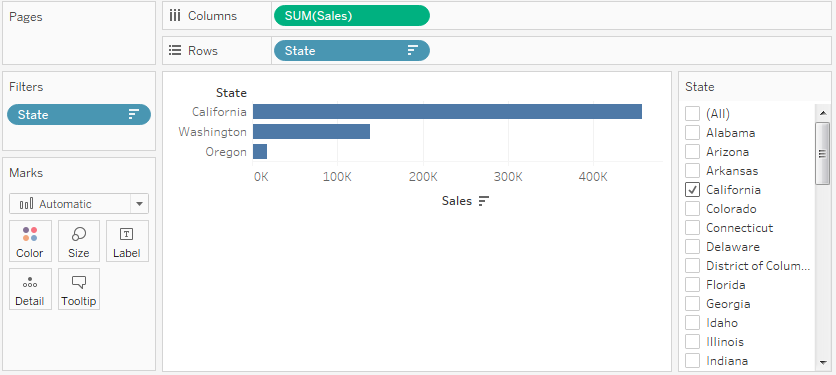
Remember, I want to only show states that are bordering the Pacific Ocean. If I show my filter control for my user, then all of the states are going to appear as filter options:
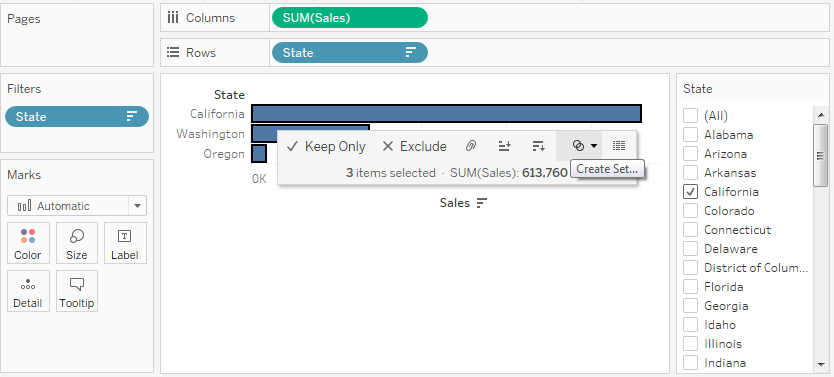
In other words, my report user can simply turn them back on. We’ll use a set to remove the undesired states completely from my view without having to use a data source filter. To create my set, I’ll select my three states and select Create Set:
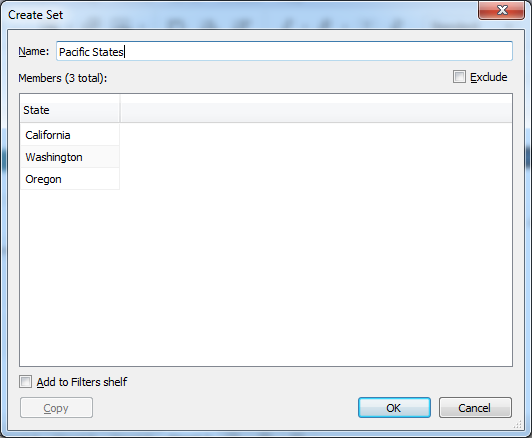
I’ll give my new set a name:
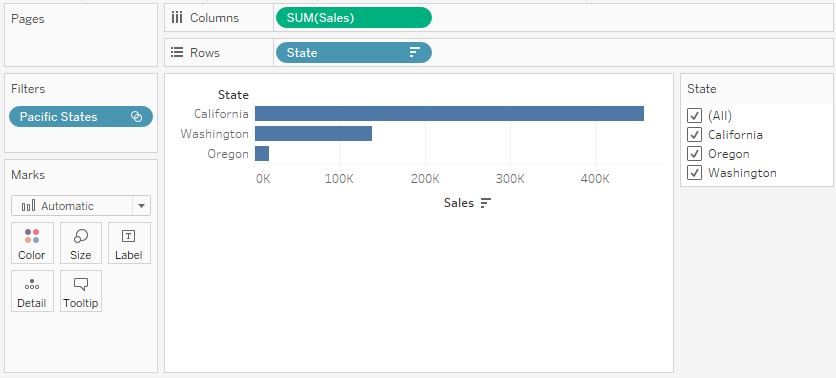
I can then add my set, Pacific Regions, to the Filter card. Remember, Tableau considers sets before dimension filters in its order of operations. This means that only the members of my set will be available in the filter control.
Shama-lama-ding-dong.
What’s Next?
We’ve just covered manually created sets, or constant sets. In part three of this Deep Dive, we’ll examine computed sets. Until then, Tableau fans, leave your questions, comments or thoughts in the space provided below. Cheers!