
Tableau Deep Dives are a loose collection of mini-series designed to give you an in-depth look into various features of Tableau Software.
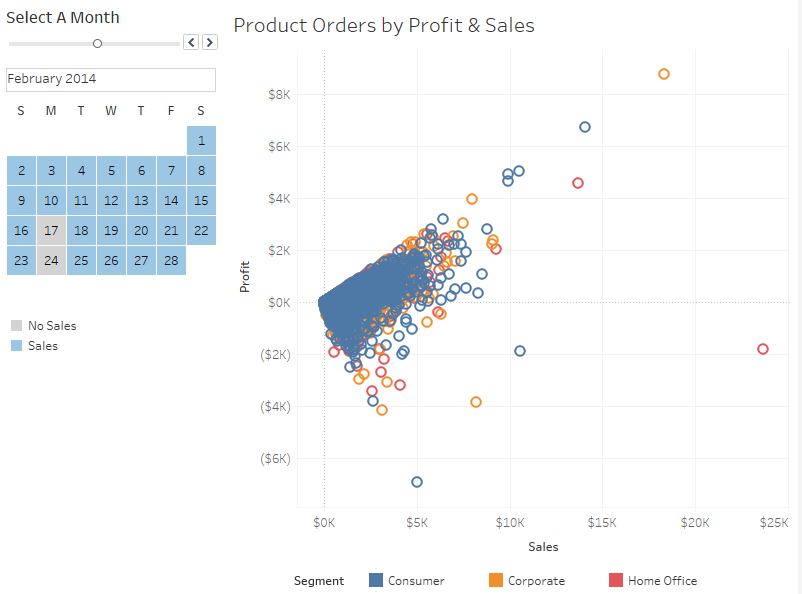
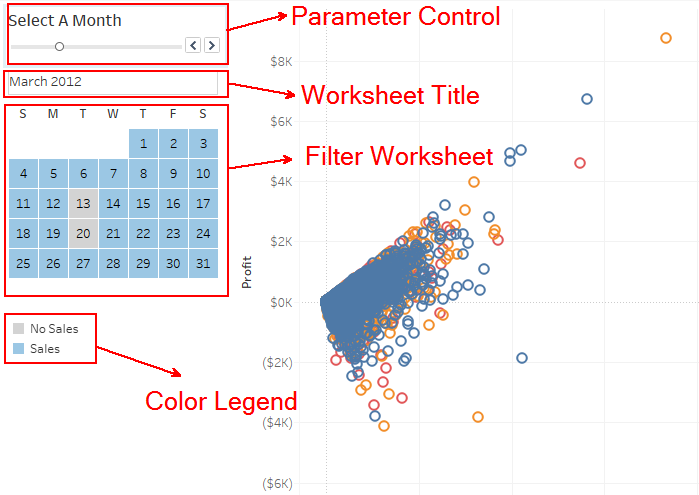
For this article in our Deep Dive on Dates, we’re going to build a filter in the form of a calendar. Our user can select an entire month or a series of days to create a subset of data on the dashboard. Here’s a preview of what we’re building:
Master Date Data Source
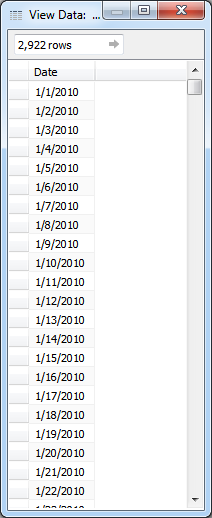
The first step is to create a master data source for every date that you’ll anticipate needing. The reason we have to do this is for days that do not have sales, we will get a NULL. For NULL dates, we won’t have a label on that date. Creating a date master will ensure that every box in the monthly calendar is labeled.
All I am going to do is create an extra worksheet in Global Superstore.xlsx data source (available here). I’m creating an entry for every day from 1/1/2010 to 12/31/2017. Here’s a sample of the data:
Let’s create a join between the Orders table and Date Master.
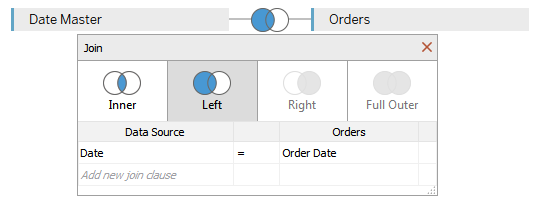
Date Master is going to be our primary table with a Left join into Orders with Date and Order Date as the linking field. That will bring in every date and the matching data from Orders.
Building the Calendar Filter
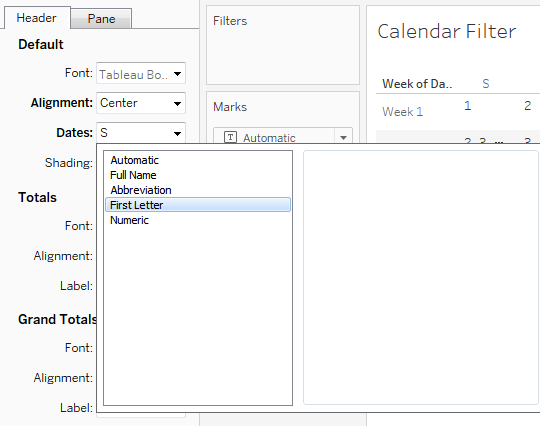
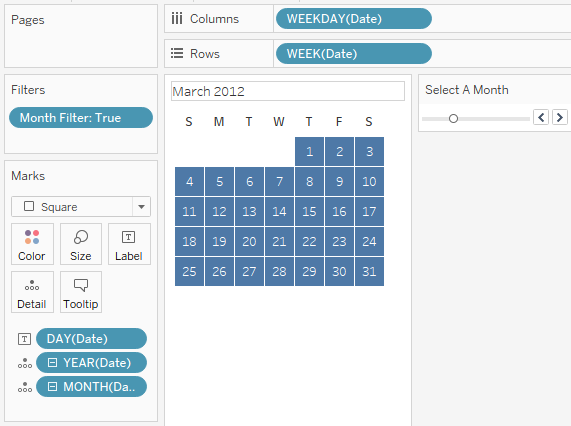
To start, add Weekday(Date) onto Columns, Week(Date) onto Rows and Day(Date) onto Labels to create a crosstab. Remember, use the Date field from the Date Master table. Right-click on the field header for Weekdays and select format. Choose First Letter and then center align.
We need a parameter next. Here is how we’ll create the Calendar Selector:
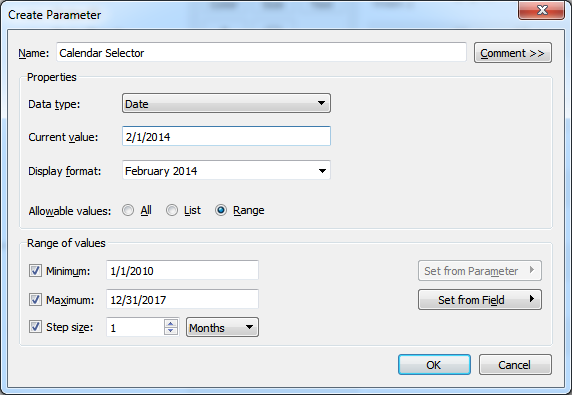
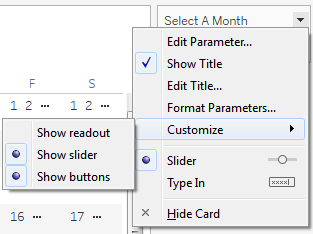
To get the date format as pictured above with only month and year, select Custom format and enter MMMM yyyy. Show your parameter control with a right-click on the parameter and select Show Parameter Control. To get the same look and feel, we need to modify our parameter control’s appearance. First rename the parameter to Select A Month. Use the down arrow on the parameter control and select Customize. Unselect Show readout to remove the text.
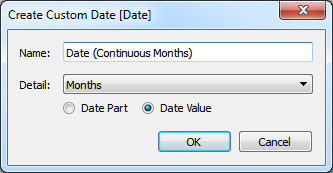
Time to use our parameter in a calculation. We’ll need a custom date field for continuous months. As a refresher on custom dates, check out article 5 from this deep dive. Remember to select Date Value for a continuous field.
Now create a calculated field like so:
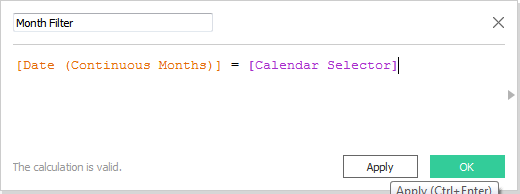
Drag that field onto the Filters card and show only true.
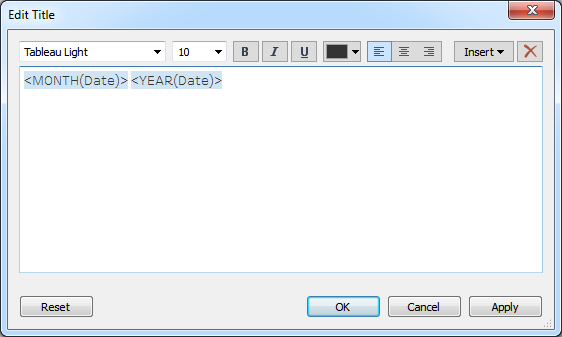
To mimic the view that we previewed at the start of the article, we want our title to look like the readout for the parameter. Add Year(Date) and Month(Date) to Detail so we can use the Insert option on the Edit Title.
Time for some formatting:
- Right-click on the title and select format. Let’s add a thin grey border.
- Right-click on the row headers and unselect Show Header.
- Right-click on the Date at the top of the table and select Hide Field Labels for Columns.
- Change your mark type to square with white borders and adjust the mark size as well as the width and height of each cell in the table to get a square that fills the entire space. It may take a little effort to get them just right so they are perfect squares.
- Center align your labels.
- Remove the line beneath the weekday initials by going to Format and then Borders and turning off Row Dividers at the bottom.
All of that gets you here:
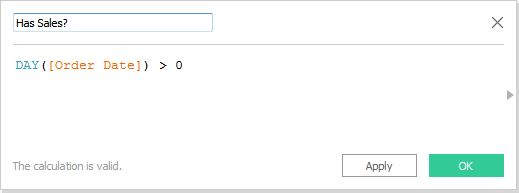
We’re ready to bring in our Orders table with another calculation:
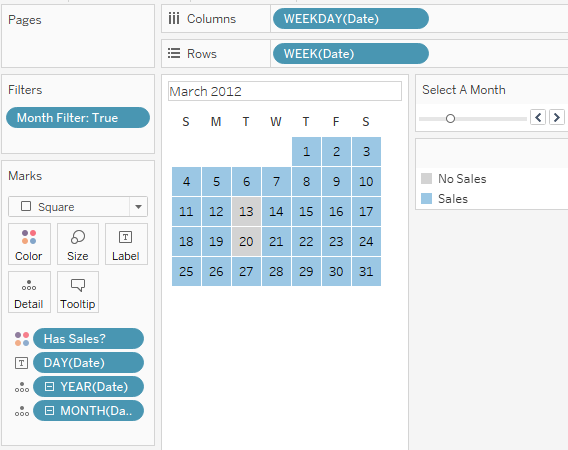
Any day that exists in the Orders table represents an order on that day and will have sales. Let’s add that to Color. Adjust the colors to your preference and then edit the aliases from Null to No Sales and True to Sales. Our calendar filter is done:
Adding to a Dashboard
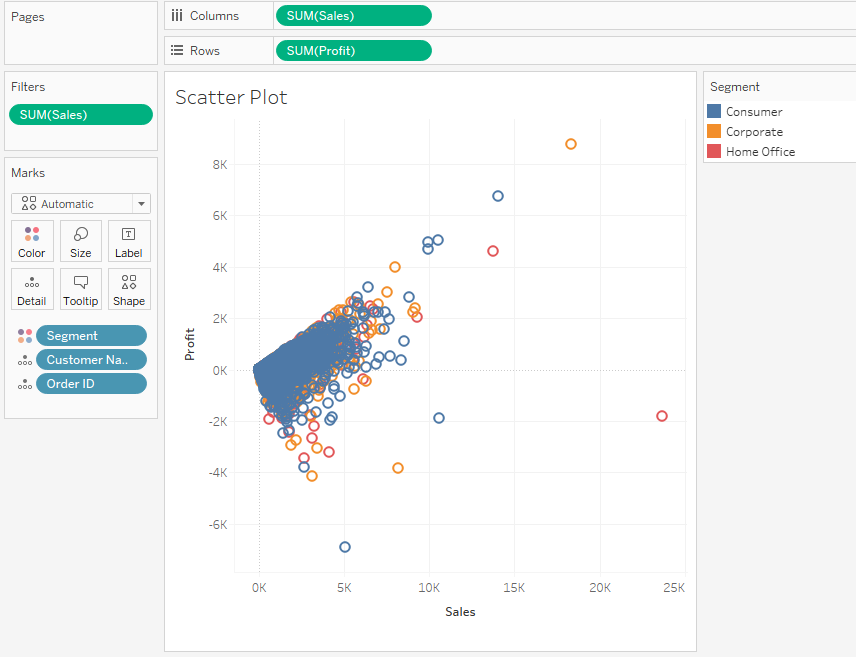
It doesn’t really matter what you use on your dashboard, so we’ll use a scatter plot just to have some data to show our filter. Here’s the view we’ll use on the dashboard. The only special aspect to this is that we have SUM of Sales on the Filters card to include only non-null values.
The worksheet, title and parameter control for the calendar are moved around like this:
You can download the finished Tableau workbook below.
What’s Next?
We have one more article to go where we’re going to take weekly performance and create a running sum from week 1 for different products. It’ll be similar to our rolling dates in article 6 with a different layout and chart type. Until then, please leave any thoughts or questions in the comments section below.
Cheers!