
Tableau Deep Dives are a loose collection of mini-series designed to give you an in-depth look into various features of Tableau Software.
Let’s continue on with our Deep Dive into Dates. This article, we’ll explore custom dates. The name admittedly is a bit of a misnomer and only really make sense if you understand date parts and date values. Make sure to catch up on this series by starting with Part 1. Let’s get after it.
Choosing the Date Value / Part
When I drag a date field onto my view, I have the option of choosing discrete (date part) or continuous (date value). Next to each there will be a plus sign to allow my user within my view to either expand my date part hierarchy or to change my date value.
That’s great … unless I don’t want my user to be able to change the level of detail of my date field. That’s the benefit of custom dates.
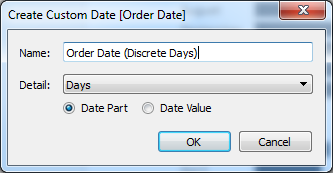
To create a custom date, right-click on your date field and select Create > Custom Date:
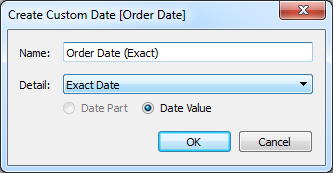
Notice that Date Part is greyed out. It’s because we start with exact date in the detail drop down. Exact date by default is going to be continuous. Refer to our previous article (#4), how we can hardcode an exact date to be discrete and how that can help us.
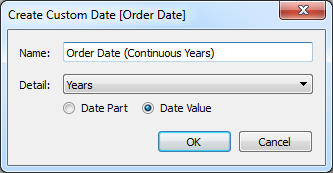
We are going to be creating a calculated field. There are three important elements to remember when you name your field, 1) the original date field, 2) the level of detail and 3) whether its discrete or continuous. Let’s make select the detail of year and select date value.
After clicking OK, you’ll find your new field in the Dimensions section of the date pane:

The data type is now green. This is the biggest exception about dimensions typically being discrete. As you can see now, there are dimensions that are continuous. Notice also that the data type icon has an equals sign on the left of it, indicating that this is a calculated field.
Let’s bring this into our view and see how our custom date for continuous years looks:
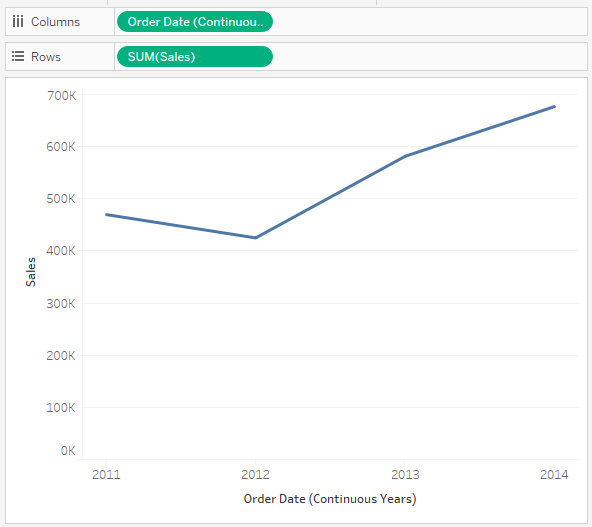
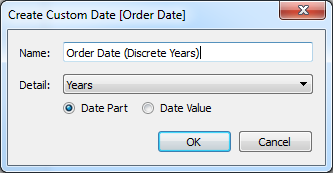
There is no plus sign to change the level of detail next to our custom date. It’d be the exact same result for a custom date using discrete year.
Custom Date Hierarchies
We can use our custom dates to create custom hierarchies with our dates. A standard date field will progress as follows: Year > Quarter > Month > Day. We can use custom dates to recreate this hierarchy however we want. Let’s get crazy. I want my hierarchy to go Year > Month > Quarter.

Our hierarchy of custom date parts would expand exactly in that order, but that’s admittedly just silly and not super useful.
Let’s change gears and create a custom hierarchy that might be more helpful by including a parameter that allows our user to change whether they are using a hierarchy with calendar year or switching that custom date to a fiscal year. Let’s get our custom dates prepared. Let’s create a discrete year, month and day on Order Date:

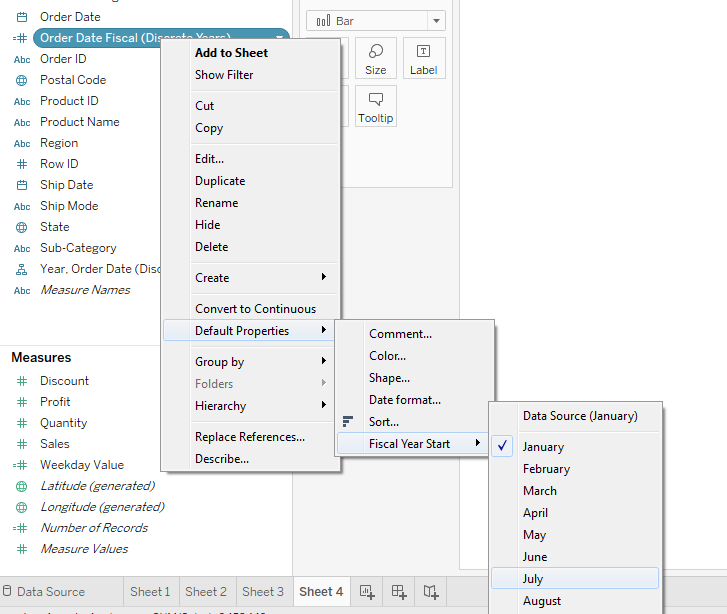
Now we need our financial year custom date. Right-click on Order Date and select Create > Custom Date. We want the detail of year and the date part radio button selected. Click OK. Now right-click on your new field and go to default properties to change the Fiscal Year start to July. That’s when we start our financial year down here in Australia.
We need a parameter to let our user decide if they want to see our date by calendar year or fiscal year. If you need a refresher on how to use parameters, check out this Deep Dive.
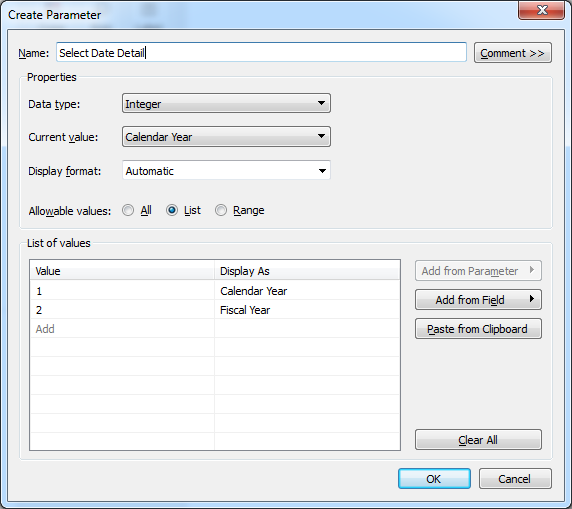
Now we’ll create a calculated field that will serve as a turnstile to serve up whichever custom date field the user wants to see:
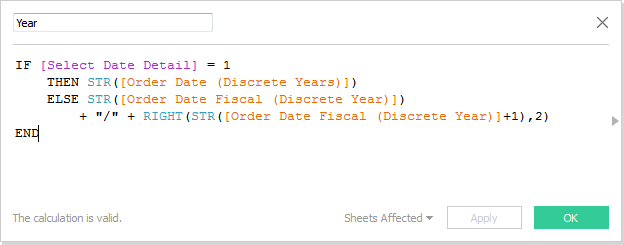
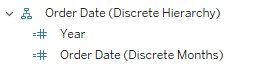
Your calculation will be a measure, but we want it to be a dimension so drag it up to the dimensions section of the data pane. Drag our custom date field for months onto the Year calculated field in the data pane to create a hierarchy:
Let’s prepare our view. Drag the new hierarchy onto Rows and Sales onto Columns. Right-click on the parameter to show the parameter control. Clear
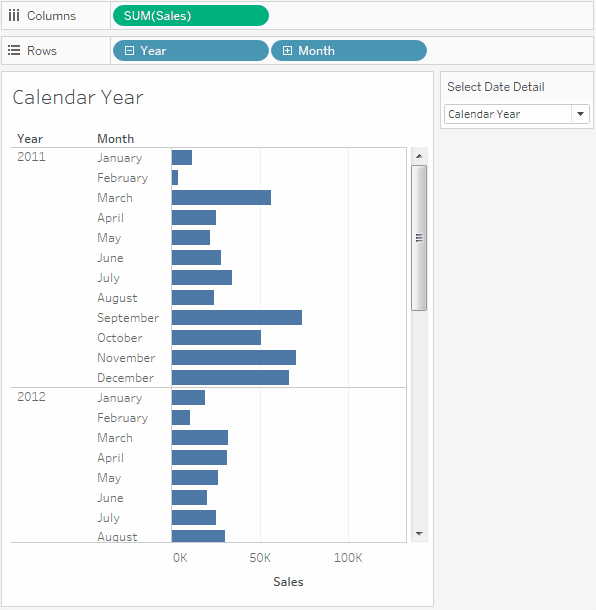
Choose Fiscal Year and expand the hierarchy down to months. You’ll see we have one more challenge when it comes to sorting our results:

Months above are being sorted as if they were in a calendar year. For our Australian fiscal year, July should be first. We need another calculation that will order our months correctly to swap out the field for a FY field just like we did for year:
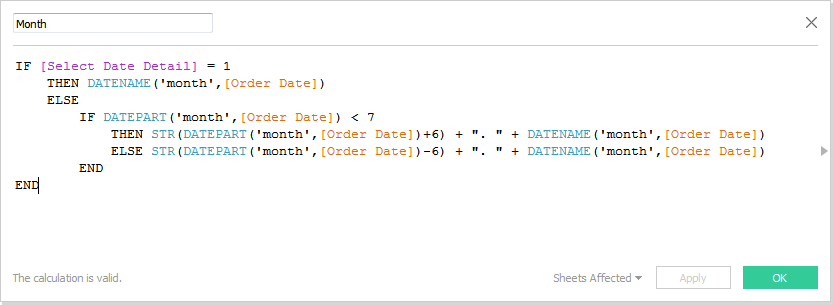
We’re assigning a value of 1 to July and on up for the fiscal year selection, continuing with 7 for January. You can see that we didn’t actually need our custom date field for months, but I wanted you to see the process that it took for us to get here.
Now our months will sort correctly:
We’re continually going back to those foundational date functions that we explored in Part 2 and Part 3 of the Deep Dive on Dates. We’re capable of doing a lot of cool stuff with dates as a result.
The Tableau Packaged Workbook that I created in the example above can be downloaded below.
What’s Next?
Are we already on article #6? Wow, dates are fun! In our next installment of this Deep Dive, we’ll build the calculation for a rolling date. For instance, how many orders did our customers make twelve months after their first order? Until then, be sure to leave any thoughts or questions in the comments section below. Cheers!